
Bill Wright of Rothwell Haigh, Samuel Dunton of Reading, George Orton and J.Spooner of Burton upon Trent, Thomas Tong of Kearsley, H.E.Jones of Hereford, George Cox of Hereford, Walter Watts of Bridgwater, William Wheeler of Guildford,
F.J.Thomas of Chertsey, Thomas of Gloucester, Stubbs of Barrowden, Fuller of St Ives, C.H.King of Wisbech, Godbolt of Norwich, Elias Leonard of Soham, Albert & Theodore Fry of the Bristol Waggon and Carriage Works, W.Watson of Belpher,
Herbert Varney of Belpher, Hallard Howcroft of Hartlepool, Fred Hill of Swineflleet, Uriah Hurst of Woodlesford, R.W.Hodgson of Halifax, John Hardman of the Radcliffe Waggon Works
FRONT DOOR AND WINDOWS
FRONT DOOR (BOTTOM HALF)
Repairing the Carved Panel Insert
After removing the front handle and inside latch, remedial work was started on the front door. I set to repairing the visible cracks on the carved panel insert, once it was stripped back to bare wood. Only when fully prepped, could I start the painting, beginning with a coat of aluminium wood primer, followed by 3 coats of oil based undercoat. The door was finished off with 3 coats of tekaloid coach enamel, then decorated using Robesons acrylic liquid gold for the carvings and one-shot signwriting paints for lettering, lining, etc.
BEFORE


Old colour scheme of front door - the carved panel insert cracked by the outside lifestyle in the British weather.
AFTER


New colour scheme of deep bruiswick green, decorated with gold carvings, lining & intitialed in the middle.


CLICK IMAGE TO ENLARGE
FRONT DOOR (TOP HALF)
Repairing & Re-glazing Required
There was damage to the glass on one of the window doors and the other had lost most of it's putty making the pane within very unstable - so both window doors needed to be reglazed. Another new skill to learn amongst many during this restoration. The frames also had to be repaired before the glazing could be attempted as joints had either become rotten or very loose, with some wood coming away entirely from its fixed position.


CLICK IMAGE TO ENLARGE
WINDOWS (N/S & O/S)
Repairing Rotten Beading
The windows were removed from the waggon and stamped with their location. All the extras such as, door handles, hinges and bolts, etc., were removed, bagged up and labelled appropriately. Luckily I didn't have to reputty these windows but I did have to replace some of the beading which was rotten. Only a small amount of remedial work was needed on the side window, mostly on the corner areas. The hinges would have to be unseized before being rebated back into the window frames. Once the windows were back on the waggon they patiently awaited decoration
BEFORE


O/S & N/S windows shown from the inside before being removed for restoration
AFTER


O/S & N/S windows shown from the inside after being restored


CLICK IMAGE TO ENLARGE
WINDOWS (REAR)
Repair, Reglaze, Repeat!
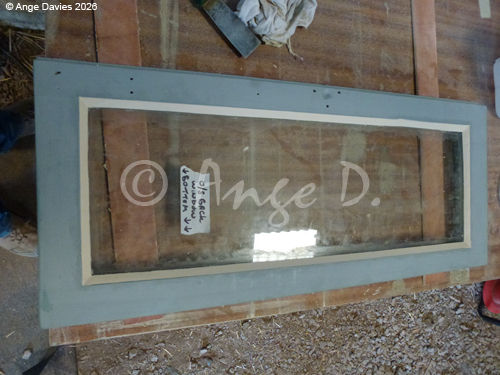
The rear windows also had loose panes due to the putty crumbling away and so I had to reglaze again. I carefully labelled the glass and the frames so I could match them back up once the frames had been prepped.
BEFORE
AFTER


Rear windows removed from waggon - crumbling putty and loose panes would mean both would need re-glazing before painting and fitting back.


Rear windows reglazed, painted and fitted back onto waggon




CLICK IMAGE TO ENLARGE
